

Translating pages
Evance has several Internationalisation options which allow you to target regional content to your visitors.
The largest body of work, when targeting an audience in another country, is translating your website into another language. Evance will not automatically translate your existing pages. You must manually translate your pages for the following reasons:
- Automated translation system are improving but are still not accurate enough to reliably translate your web pages.
- Manually translating your pages affords you the opportunity to cater for colloquialisms.
- You may decide to offer slightly different or more market friendly content in another country.
- Phrasing may need to be altered in another country to cater for regional laws.
Prerequisites
Before you can being adding translations to your website you must have the following in place:
- You will require an Evance plan supporting "multi-regional" content. These include Website Premium, Catalogue Premium and Ecommerce Premium.
- You must have added at least one new locale.
- You should have read and understand our introduction to Internationalisation.
- Hopefully, you have some translations for your content.
Principles of translations
As described in our introduction to internationalisation, each web page within the CMS behaves as a seed page for translated content. Your translations behave as an extension to the original page in your default language. If your website's default language is English, you must have an original seed page in English before you can add your translation.
Translations vs locales
You should be aware that translations are not directly linked to your locales. Evance calculates the content to display based on the language and country settings for available content. Curating content in this manner delivers a more graceful and more rapid evolution of your content.
A French example
Let's say you have a locale in French for France (/fr-fr) and French for Canada (/fr-ca). Despite
regional variations, French is the common language across both locales. Therefore, you should start translating into
French international before catering for Canadian French.
Having added international French translations Evance will display this content for any locale requiring the French language (if a country specific translation is unavailable). This means whilst you're adding content into your website in French international, both of your French based locales are being catered for at the same time. You can then opt to add country specific variations into your content for greater accuracy.
Now, let's imagine you wish to add a new local for French in Belgium (/fr-be). As soon as you add this new locale all content
already translated into French international will automatically be served on your new Belgian locale. You can then add regional variations as required.
Page hierarchy and translations
Web pages are hierarchical, so translation priority should be given to pages highest up the chain first.
Translating pages in practice
Ok, with all of that theory out of the way, let's start actually translating content. Open up a page within the CMS and open the document settings window.
Within the document Settings window you will find a translation option drop-down in the top right.
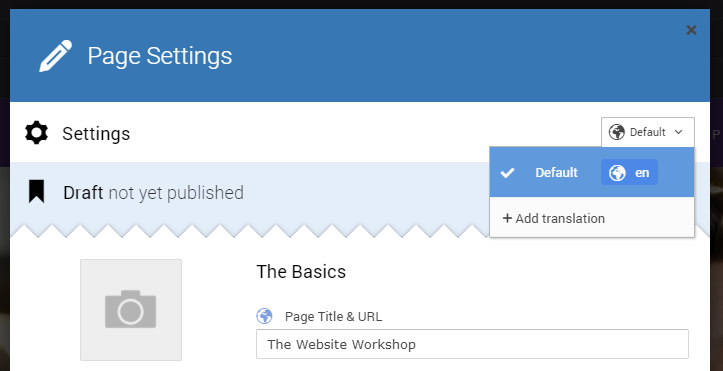
Click on the "+ Add translation" link in the bottom of the menu.
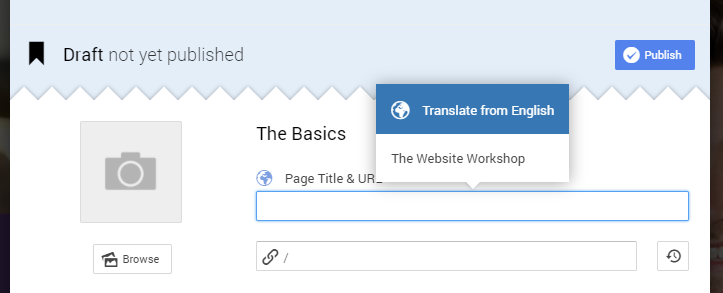
You may now start to add translations for:
- Page Title
- The URL of the page.
- Short description
- Browser title
- Meta keywords and description
Each field to translate will appear blank. As you enter a field you will be offered a hint to its original value.
Note: You should always ensure the URL of your page has been translated properly.
You may opt to use the same URL as the original seed page without conflict.
When you are satisfied "save" your settings.
Wait for the editor window to reload. Once, it has reloaded you should see the following window:

This window will appear every time you access a page on your locale where one or more areas on the page have yet to be translated. Press "OK" to continue.
You will now see the web page in your original seed language.
When you click within an editable region on the page you will see the following window:
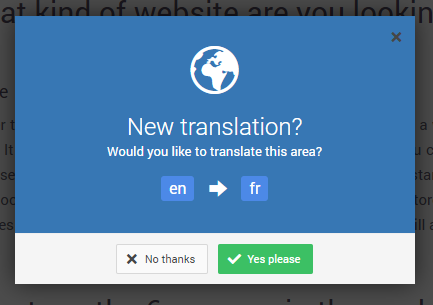
Press "Yes please" to start translating this area. You will then be presented with some translation options and you should select the appropriate option to the language and country you are translating for.
Note: this selection only applies for the current editable region. You will need to repeat this step for other regions on the page if applicable.
You can now begin to edit and overwrite the content on the page with your translated version.
Once you are happy with the translated content press "Save" in the top right of the editing screen as usual.
If you wish to add another translation for this page simply repeat the steps above by going back to the Page Settings screen.