

Upgrading a Basic Form to Form Builder
How to upgrade your Contact Us page to implement Form Builder.
When you first install a theme you may find that your Contact Us page either has a basic form or no contact form at all. In this article we explore how to implement a new form using Evance's Form Builder. We'll also illustrate how to implement Google's reCAPTCHA service to help prevent spam.
Before you begin
It's a good idea to double check that your theme's Contact Us page supports Form Builder by default.
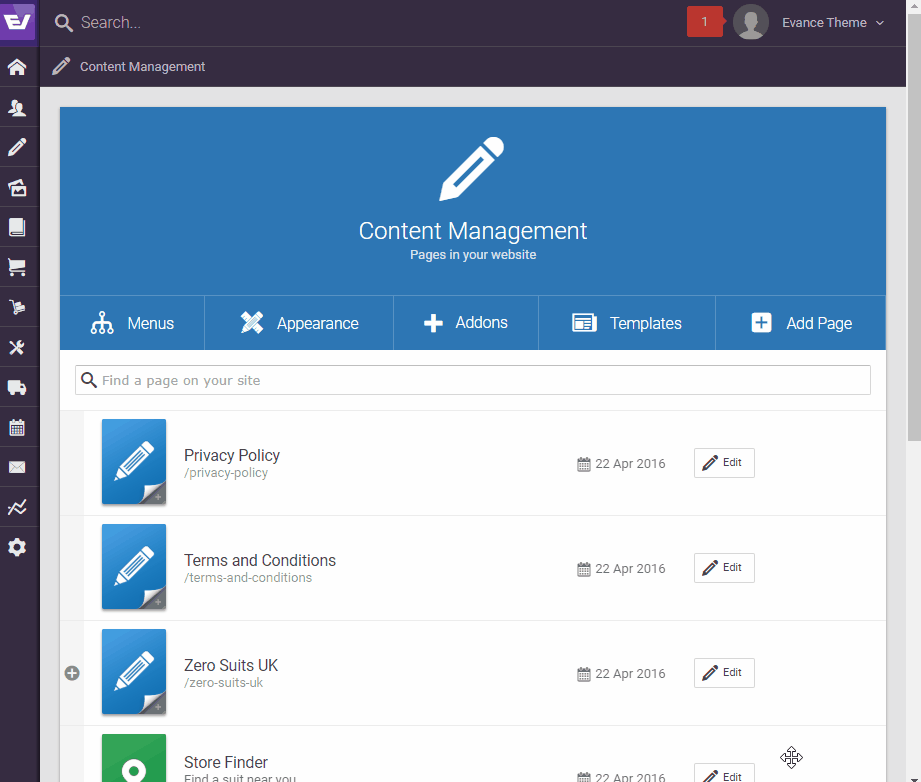
- Click on the pencil icon in the left hand menu to access the Content Management pages list.
- Locate and click on your Contact Us page.
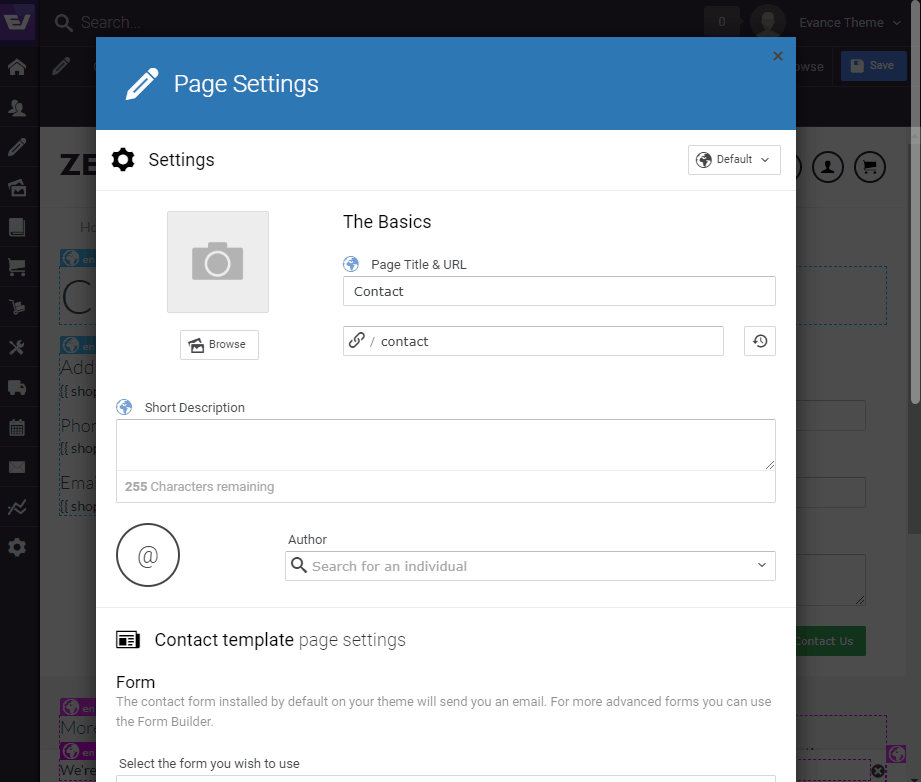
- With your Contact Us page open in the CMS editor click on the "Document > Settings" menu (illustrated below).
If your website's Contact Us page supports Form Builder you will see a section labelled "Form" with a drop-down. If you already have Forms within the Form Builder the drop-down will include those available and you may select the relevant Form.
If you do not see a section to be able to select a Form you will need to have the functionality implemented into your page. This is not a complicated process but does require some coding knowledge.
Creating a form in Form Builder
Once you have established the ability to add a form on your page you can now build the Form you would like.
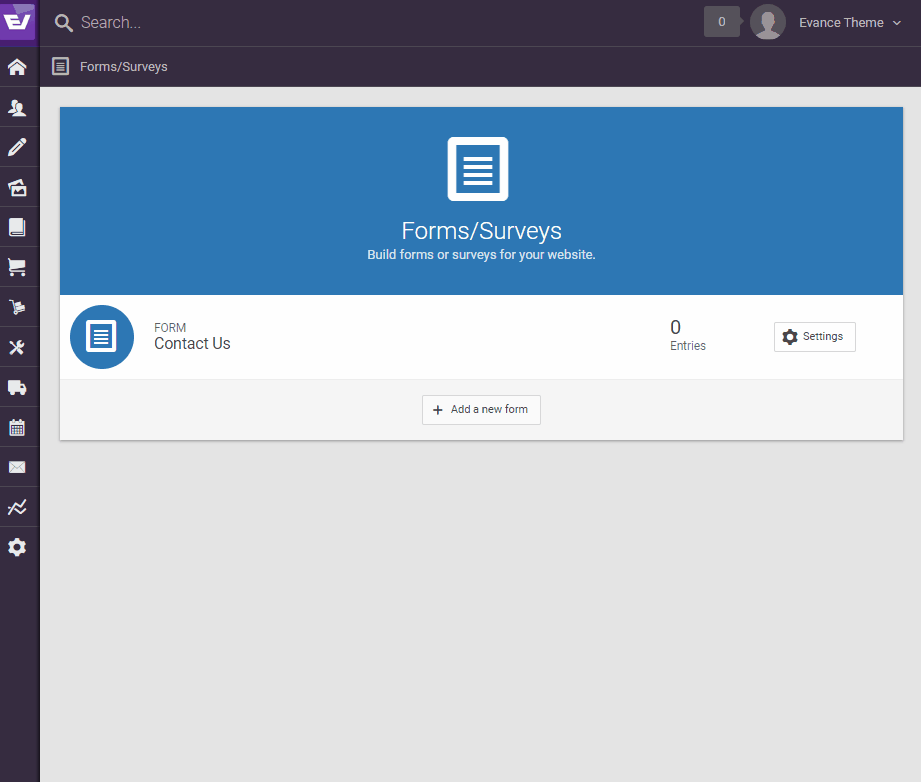
- Click to expand the left-hand menu.
- Click on the "Content" to expand the content menu.
- Click on the "Forms/Surveys" menu item.
If this is your first form you will be prompted to add a new form.
Next, you'll need to enter the information about your Form.
- Enter the title for your "Contact Us" form in the Title field.
- Enter a brief description of the Form in the Description field.
- Select "General Form" from the options. If you do not see any form types to choose from, your plan only supports the General Form by default.
- Click the "Save form" button.
Adding fields to your form
Now that you have create the Form you need to start adding some fields.
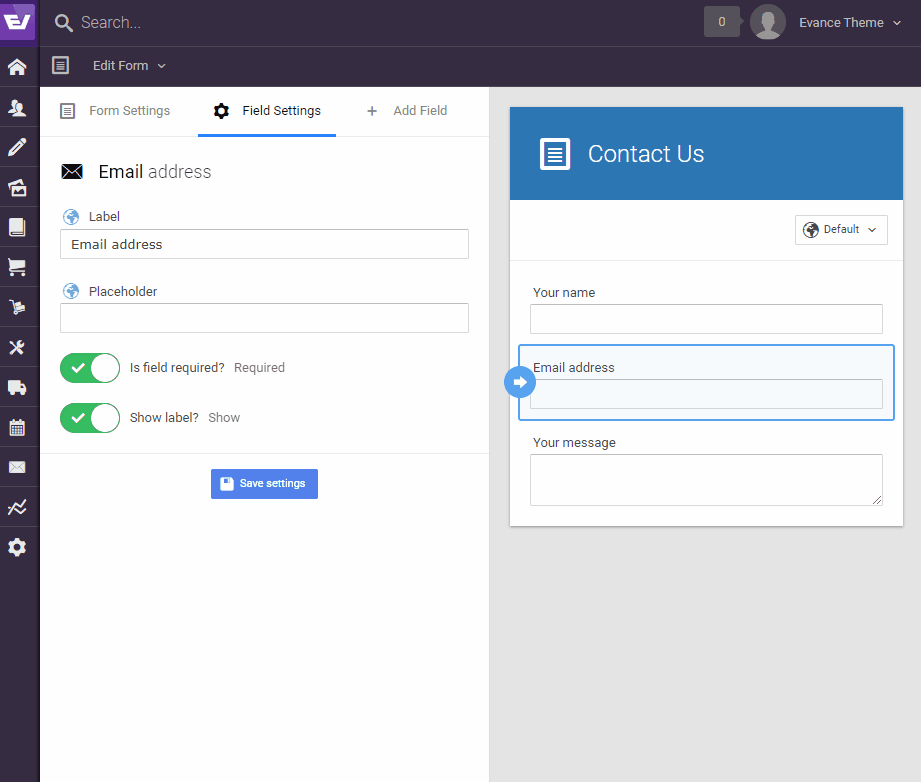
- Click "Settings" for the new form you created.
- Click on the "Add field" tab. Usually this is the default tab.
- Click to add the field types you would like to add to your form.
- Click on the field you would like to edit in the right-hand side of the screen to start editing the field's settings.
Sending confirmation emails
When a user submits this Form on your site you may wish to send them a confirmation email.
Note: This requires that you added an Email Address field type to your Form.
- Click on the "Form Settings" tab.
- Scroll down to the "Email notifications" section of the Form Settings screen.
- Switch on "Send confirmation to user?".
- You may optionally add a Subject and Message.
- Select the "Recipient email" address field. This requires that you have an "Email address" field added to your website.
- Select the "Recipient name" field.
Adding anti-spam protection
To add anti-spam protection to your form requires a Google reCAPTCHA security key. We'll explain how to do this below.
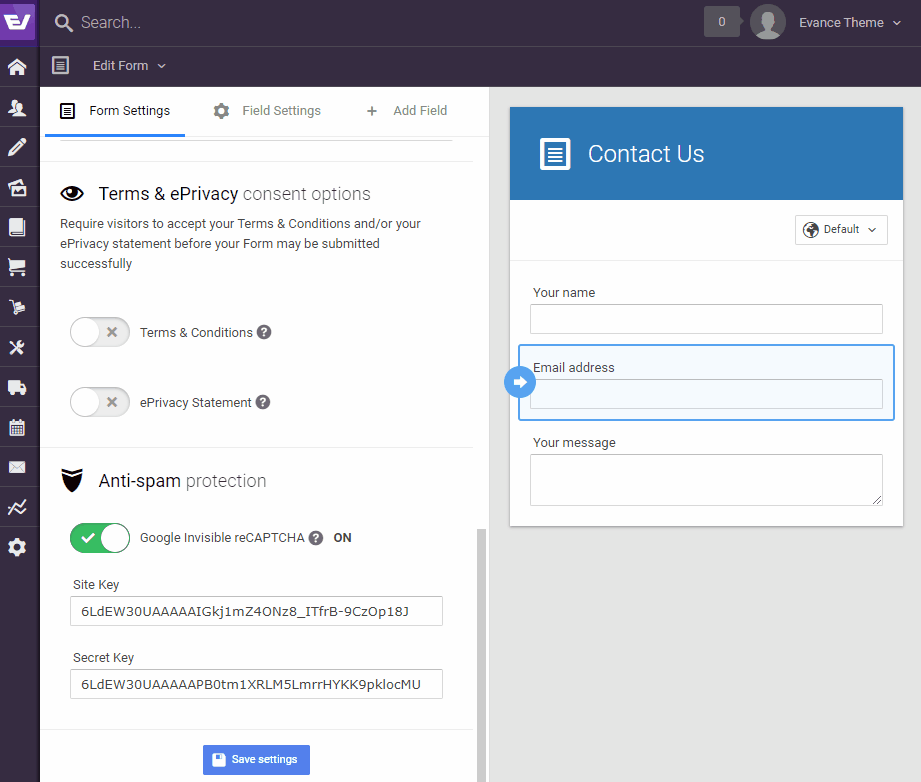
- Scroll down to the "Anti-spam protection" section of the "Form Settings" screen.
- Switch "on" Google Invisible reCAPTCHA.
- Go to https://www.google.com/recaptcha/admin (requires a Google account)
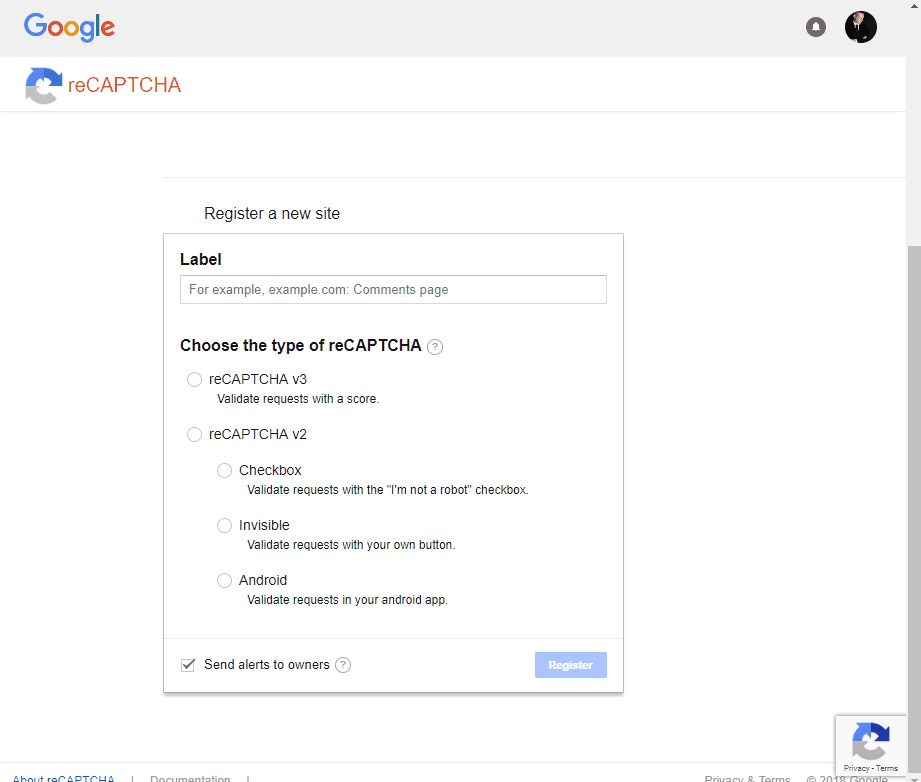
- Register a new site with Google reCAPTCHA
- Enter the name of your site into the Label field provided
- Click on the reCAPTCHA v2 Invisible option
- Enter your domain name into the Domains field (optional).
- Tick to accept the Terms of Service.
- Click the Register button.
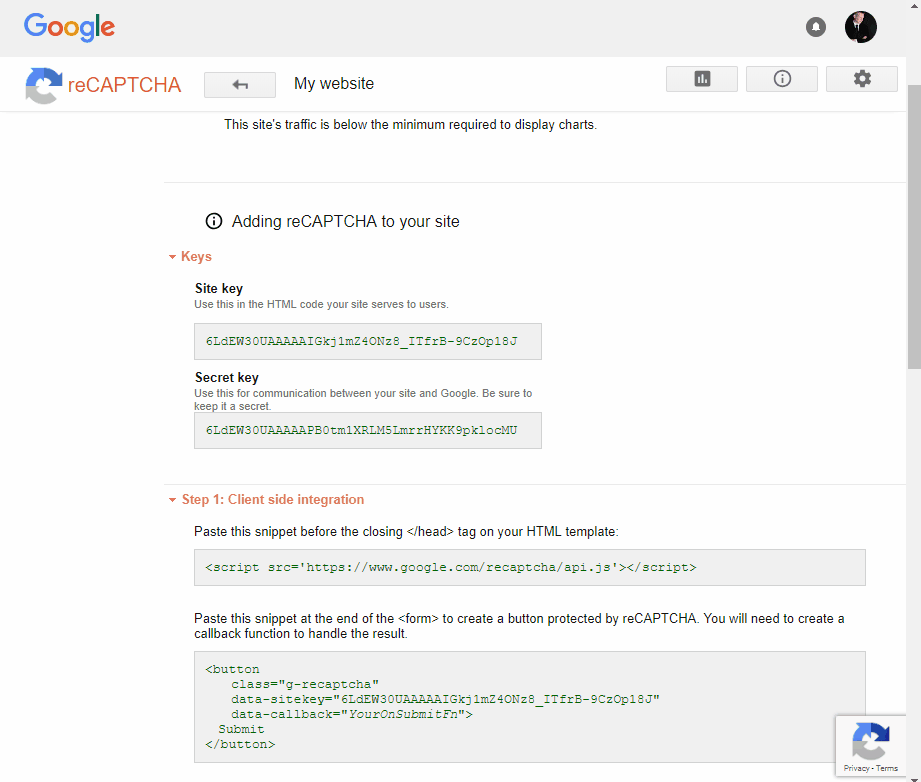
Once you have registered your site you will be presented with two "Keys".
- Copy and paste your Site key into the field provided in Evance
- Copy and paste your Secret key into the field provided in Evance
Adding your new form to the page
With your new Form created we can now add it to your Contact Us page.
- Click on the pencil icon in the left-hand menu to return to the Content Management pages list.
- Locate and click on the "Contact Us" page.
- Open up your "Document > Settings" screen.
- Scroll down to the Form settings section of the page.
- Select your new Form from the available drop-down and then press save.
- When the page reloads you'll see your new form.
Finally
We recommend testing out your new form to ensure it's working as you expect.
You may also wish to double check you have your SPF records set-up properly for your domain.